Configure SSL Certificate for Juniper J-Web Interface
 Friday, March 11, 2011 at 10:03
 By default, the J-Web interface (GUI for the Juniper SRX firewalls) has SSL enabled. Like most devices with SSL out-of-the-box, the protection is based on a self-signed certificate. Self-signed certificates are easy (they come basically out-of-the-box), but they tend to nag you every time you connect to the GUI. So, it's time to install a proper certificate.
In this case, I use the XCA (1) software to create a new certificate. This certificate is signed by my own root CA, which I installed on all of my devices and Operating Systems. Basically, I trust myself.....
According to the Juniper support pages on SSL certificate usage, I found out that the certificates are to be in the PEM format. No problem for XCA.
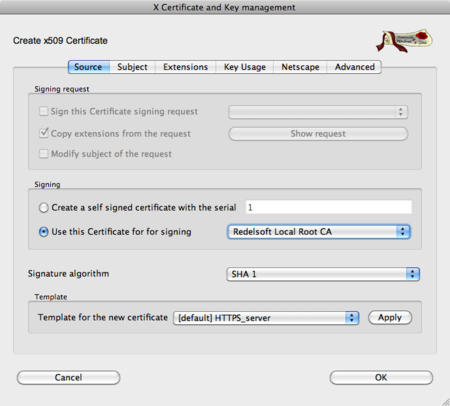
First, generate a new certificate, don't forget to select the (proper) CA for signing it, and to select the HTTPS_server template (AND PRESS APPLY!!!!).
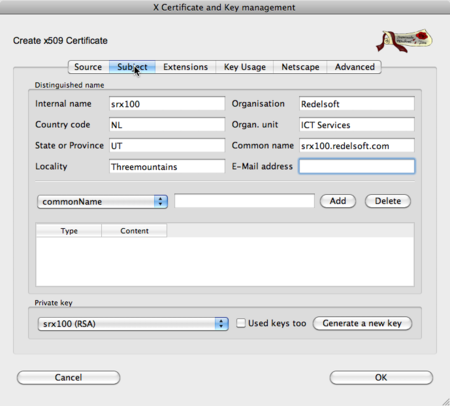
Next is the information of the certificate itself. Use the information of your own environment. The important items are: Generate a new key, and the common name. The common name should be the Fully Qualified Domain Name (FQDN) when the device is accessible from the Internet. It's the name shown in the subject field of the certificate. Internal / others names are entered in a different window.
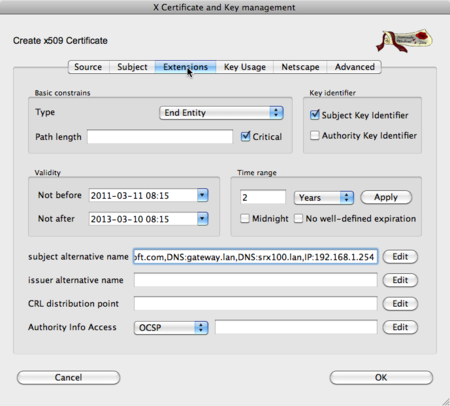
On the Extensions tab is the Subject Alternative Name attribute available. This attribute specifies which other names can be used in the browser, and not showing any errors.
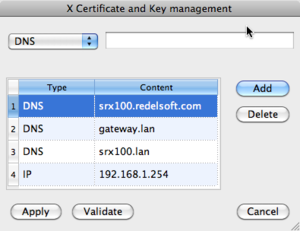
In my case, I'd like to access the device on several different names (one of them being an IP address). Just make sure that you select the proper types. The order in which you enter them isn't important. Don't forget to include the original common name you used.
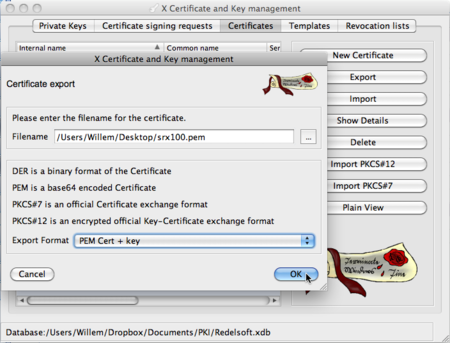
After the generation is completed, you can Export the certificate. Just make sure you select the PEM Cert + Key option.
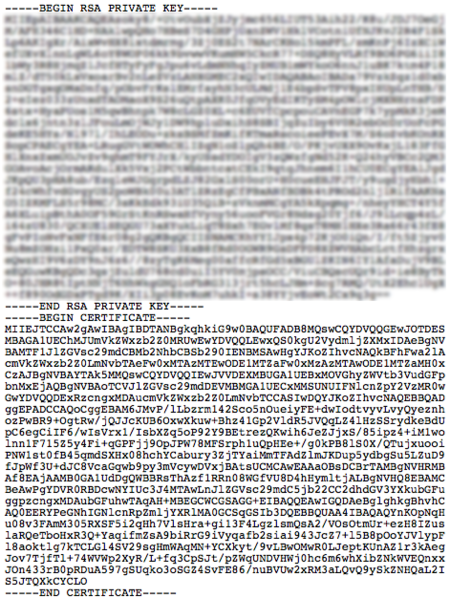
This will result in a PEM file (readable by a text-editor) containing the certificate and private key.
The contents of this text file is added to the SRX firewall.
Select in the J-Web GUI Configure -> System Properties -> Management Access, and press the Edit button.
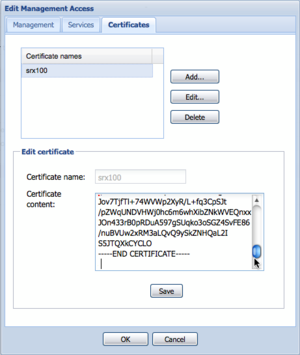
Select the Certificate tab, and press Add.
Enter a logical name for the certificate (preferably the FQDN of the certificate), and past the entire contents of the exported PEM file in the Certificate content text-area, and press OK.
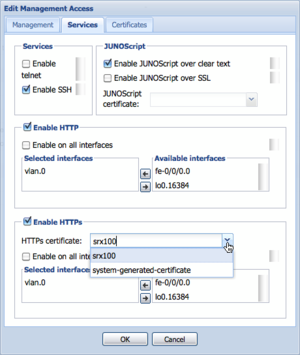
All that's left to do is assign the new certificate to the https interface by pressing the Edit button (again) in the Management Access part of the configuration. This time selecting the Services tab in the pop-up, and selecting the correct SSL certificate in the HTTPS dialogue.
Clicking OK and Commit installs the certificate on the firewall.
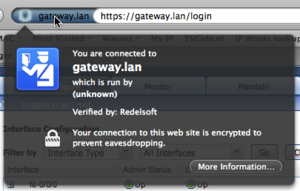
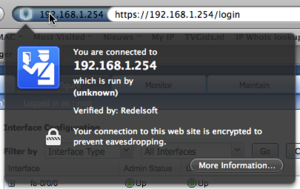
After installing the certificate, you can login on the https login page without any warnings.
The following screenshots show that I have proper access based on one of the Subject Alternative Names I choose in the certificate creation process (the Extensions tab). Even connecting to the IP address works beautifully.
Remember, this only works if you're using a certificate created under a trusted CA. In the case of a commercial CA, this still works to some extend. Not every CA vendor allow those subject alternative names, and you might need to fiddle around with other tooling (like OpenSSL) to convert between formats to get to the PEM + Key format.
 Willem |
  2 Comments |
  J-Web,
  OpenSSL,
  certificate,
  juniper,
  ssl,
ssl,  xCA in
  Hardware,
  Security,
  Tips'n Tricks


Reader Comments (2)
Thank you for the information, very useful!
Good One. In user-friendly format that a newbee can understand.